Showing posts with label America's Test Kitchen. Show all posts

Beef and Barley Slow Cooker Soup

It looks like Mother Nature has finally stopped playing "spin the bottle" on what season it is. It's finally raining!  Of course, we Californians don't have a true Four Seasons.  Yes, we're spoiled. We also pay hefty taxes, so I guess we're even.


Recipe#3 that I've made from this cookbook.

Did I ever mention that I meant my shy and handsome husband at a golf course? No?

Take note, those of you mature single women who are hoping to meet a single man-- golf courses are ripe for the picking! I figured that out, when I found myself divorced, with a teenage son, 8 years ago.  I hadn't torn up the dance floor since the BeeGee's were all the rage, after Saturday Night Fever was a box office smash.  So, I took golf lessons and started a Singles Golf Club.  True story.  Oh, did I mention that I used Match.com to help recruit members?  Never let is be said that I'm not an enterprising woman.

What does golf have to do with this recipe?  You have to think as I do. Random.  This weekend is the world famous AT&T Golf Tournament at Pebble Beach.  That means that I'm staying home-- far and away from the crowds.  It also means that it's raining today, because the tournament will usually bring out the Rain Gods.   That means soup is a perfect meal. My man loves them--especially anything with barley. 

To make Beef and Barley soup, you begin with.... well, naturally, you would buy beef.  I learned a tip from America's Test Kitchen that has forever changed what kind of beef I use for soups and stews. If you've never heard of chuck eye roast, please ask your butcher about it.  Unliked neat labeled "stew cut", I find that chuck eye roast is very tender.

To begin with the soup, it does start with a skillet. Using a couple tablespoons of vegetable (in my case, I used olive oil), cooked chopped onion, some tomato paste, and thyme (dried or fresh) until the onions are softened and slightly browned.

This takes about 8-10 minutes. In the meantime...I lined my removable slow cooker insert with a plastic liner (easily found at your local grocery store). These make cleanup super easy.

To build more flavor, we add dry red wine, then add the cooked onions to the slow cooker.  Next, we add in crushed tomatoes, beef and chicken broth, chopped carrots...

...soy sauce (I use Tamari sauce), 

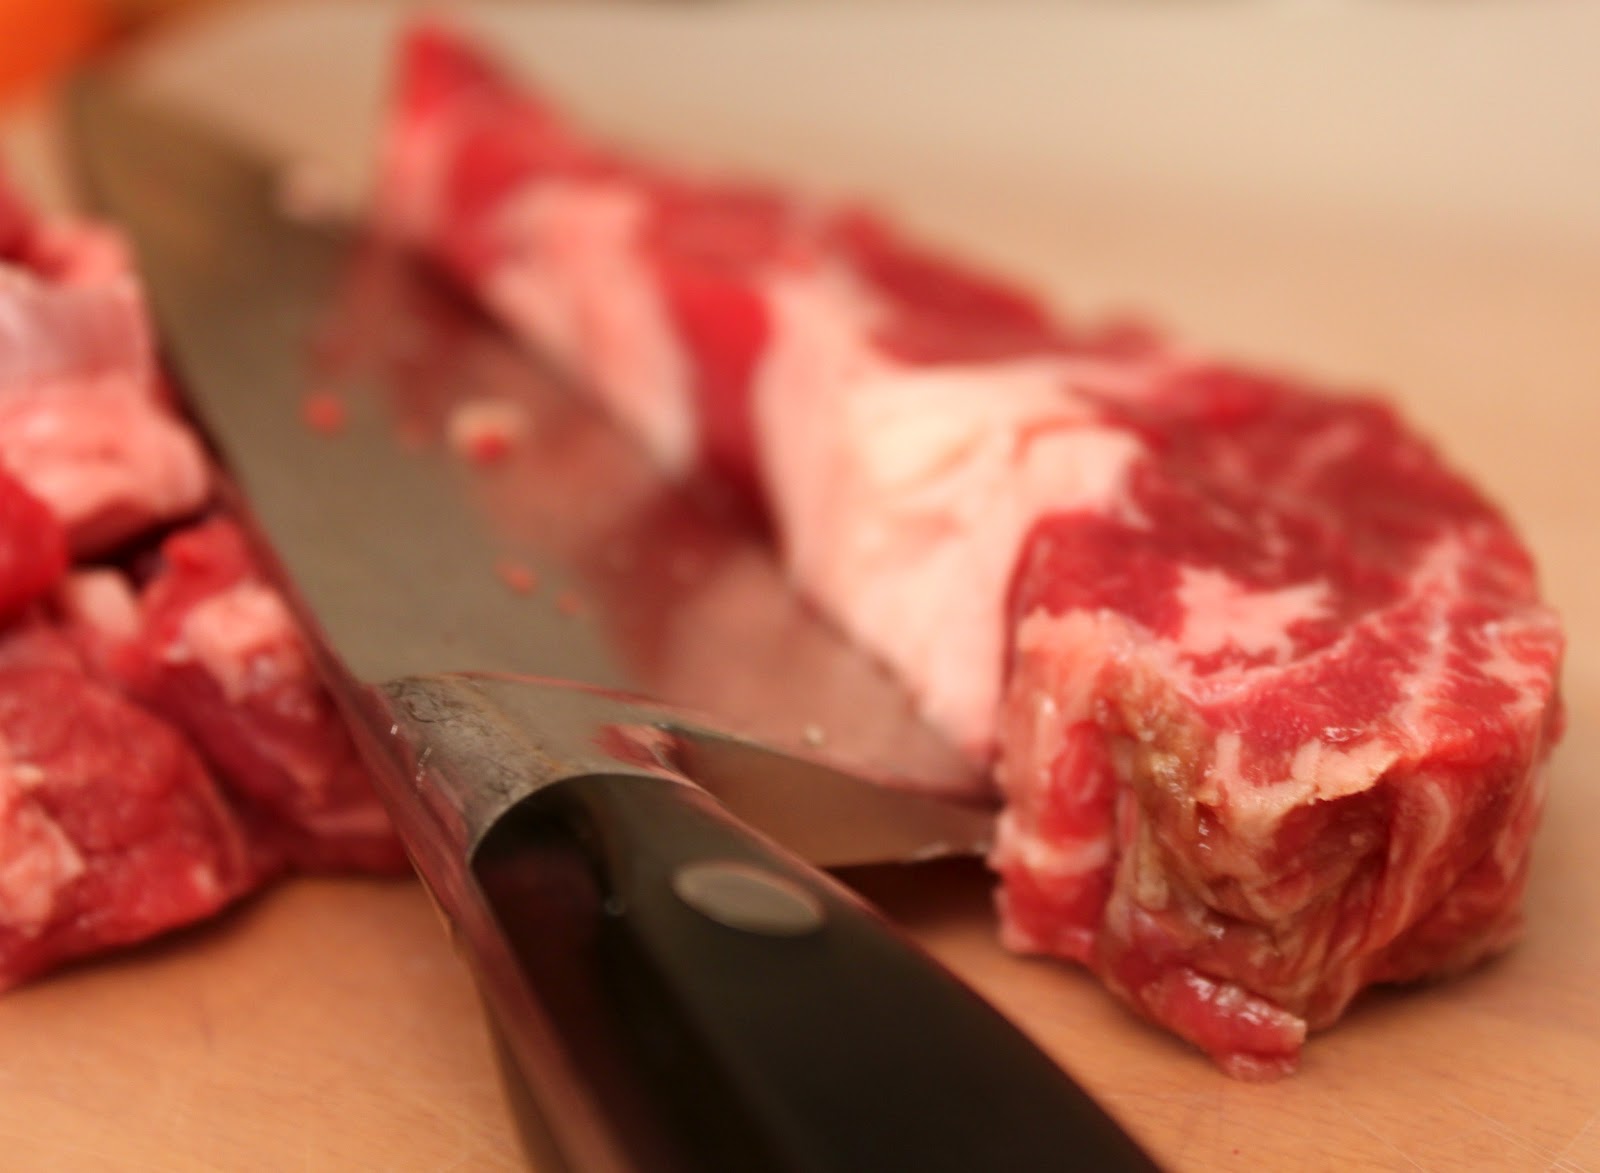
...barley and then the cut up meat, that has been seasoned with salt & pepper. At this point, I covered the slow cooker insert, put it into the fridge and went to bed.  Obviously, if you are a homemaker, you can do all of this earlier on the same day you want the soup.   Early in the morning, I turned on the slow cooker to the low setting and came home 11 hours later.  

This is when I don't gripe about having to prep my slow cooker meal, the night before.  It's a nice feeling to come home to smelling your dinner cooking away.  ATK says to remove the meat, and then shred it into bite-sized pieces. I skipped that step, by cutting my pieces into bite-sized chunks in the first place.  Simple details.  I didn't have much fat to skim off the top, either. 
I added some fresh chopped parsley, made a quick green salad and sliced some fresh French Bread.

For the finishing touch, we had a roaring fire going and listened to much needed rainfall outside.  


TASTING NOTES:   This soup has a very rich red color to it, because of the crushed tomatoes and red wine.  The beef is super tender.  I felt a little disappointed in that I didn't go with my gut instinct to increase the amount of barley from 1/4 cup to at least 1/2 cup.  I really appreciate a higher barley to beef ratio, and I could barely detect in the soup.  As for the flavor, I liked it.  I'm a lover of all things flavored tomato, but I felt that the crushed tomato overpowered the flavor of the beef.  However, my son disagreed with me. He loved this soup.  That is not to say that this isn't a good recipe. It is.  I would say that you need to adjust the recipe to have less tomato, if that's your preference.  I would definitely double up on the pearl barley, if not more. Other than that, this is a lovely soup and I would make it again.  In fact, I did!  Only, this time, I made it on the stove with a few changes.  I will share that soup with you, as well, since it's a bit different than this one.

I am glad that I have re-bonded with my slow cooker.  Sure, I spend a half hour prepping dinner the night before. But, it is gives me the next night off from having to prep, cook and clean pots and pans.  I've bookmarked a few more recipes from this cookbook that I hope will be as good as the last three I've posted and shared with you. Let's see who won my giveaway to receive a copy of America's Test Kitchen Slow Cooker Revolution.

I think I'll tune in to our local news to see how Tiger Woods and all the other professional golfers are doing with this weekend's golf tournament.   Did I also mention that I haven't swung a golf club in about four  years?  At least I scored well with my Valentine-- my wonderful husband.  I figure that once we both retire, we'll have plenty of time to hit the putting greens.

A printable recipe card is at the end of this post.


Tequila and Lime Turkey Chili - Slow Cooker Style

I remember when crock pots first became the rage. Some of you might not have been born yet, but I was a young bride who had a very limited repertoire of recipes to make.  At that time, it seemed so cool that I could throw in some chicken and a can of soup and come home to dinner.   Several years ago, I upgraded my crock pot to a programmable slow cooker with a removable ceramic insert.  I like the oval shape and size, so that I can cook larger cuts of meats.  However, my slow cooker spends a lot of time, sitting on my garage "kitchen gadget" shelf.   My reasoning was that I don't have time to prepare a slow cooker meal in the morning, before work.

Then, I had an "aha" moment, that I should prepare the meals the night before, then turn on the crockpot before leaving for work. D'oh!  So, I bought America's Test Kitchen Slow Cooker Revolution Cookbook... and the book ended up sitting on my bookshelf for a few weeks.   I finally made time to read the cookbook, and I have to say that it's well worth the investment. There is a lot of updated information on how to choose a slowcooker, and a lot of valuable tips from America's Test Kitchen.  The first recipe I made, and posted, was Easy Barbequed Ribs, and those turned out to be easy to prepare and very tasty.

I decided to try the Tequila and Lime Turkey Chili.  To be honest, I've made chicken chili, and turkey chili before. I found them to be lackluster in flavor.  However, the fine folks at America's Test Kitchen promised that they had a few tricks up their sleeves that would yield a moist and flavorful turkey chili.  As luck would have it, I had all of the ingredients on hand.  So, the night before, I prepared the chili.  The first step is to make a "panade" of white bread soaked in milk.  This prevents the lean turkey meat from becoming dry. I needed fresh oregano and garlic cloves.

The spices I needed were chili powder and cumin.  A skillet is heated with some vegetable oil over medium-high heat, until shimmering.

Next, I add onions, chili powder, tomato paste, garlic, cumin, oregano and red pepper flakes and cook until vegetables are softened and lightly browned, 8 to 10 minutes.


Stir in turkey mixture and cook, breaking up any large pieces with a wooden spoon, until no longer pink, about 3 minutes. Stir in tomato sauce, scraping up any browned bits; transfer to slow cooker.

Next, I add a can of diced tomatoes, pinto beans...

 ...3 tablespoons tequila, soy sauce, honey, and chipotles* into the slow cooker.  At this point, I put the slow cooker (good thing I have a removable insert) into the refrigerator until 6am.   *Chipotles in adobo sauce are pretty easy to find-- usually in the International Aisle.  They come in a can, and I use about half of what a recipe calls for . Chipotles are smoked jalapenos, and they can pack some heat!  I freeze the remaining chipotles, and simply chop what I need-- it quickly thaws when I add it to a hot recipe. Easy!


At that point, I sleepily plug in the slow cooker, and nestle the insert into it's cozy spot.  I turn it on, at low, for the six hour setting (my slow cooker has a Keep Warm cycle), place the cover on and dinner will be ready when I arrive home.

 I have to admit that this recipe is a little fussier than adding a can of this and a can of that.  However, it is nice to walk into my house and to be greeted by the aroma of something savory.  The final steps are to skim off the fat from the surface with a wide spoon. However, I didn't find that much fat at all!  Next, I add a little honey, a little more tequila, fresh lime zest and lime juice.

Dinner is ready, along with a fresh salad and either corn bread or flour tortillas.

I decided to garnish the turkey chili with avocado and sour cream.

TASTING NOTES:  I decreased the chipotle from 1 teaspoon to 1/2 teaspoon (I'm whimpy about heat).  The chili has a tangy flavor from the tomatoes, with light notes of citrus from the lime zest and juice.  This is very different than a traditional beef-style chili, but it's a nice change.  It tastes "healthy". I don't know what to say if you have children to feed-- there isn't a lot of tequila, but I'm not going to risk Child Protective Services from paying you a visit.  If you leave out the tequila, I'm sure that the chili will taste fine-- or, you could skip adding more tequila before serving. The first two tablespoons, added at the beginning, would have long cooked out any alcohol. Your choice.
NOTE:  If you don't own a slow cooker, you could simply simmer this chili on low heat for a couple of hours. I'm sure it will be delicious.

This made a lot of chili for the three of us, so I froze half of it for one of those work nights when I am too tired to cook. That's when I'm glad that the microwave was invented!


A printable recipe card is at the bottom of this post.


Weeknight Roast Chicken With Lemon-Tarragon Pan Sauce


Oh, hi!  It's Friday. Amen.  It's been a wild week at work, and I haven't been able to post recipes for over a week. I've missed y'all!

It didn't help that I popped a rib, last weekend.  I won't get into the sordid details as to how it happened.   Let's just say that I slept about two hours, total, last Sunday night.   I was in so much pain, that I couldn't wait for the sun to come up so I could show up at my chiropractor.  After some painful deep massage , I could hear a "pop" as my rib went back into place.  Instant relief.

The rest of my work week kept me pretty busy, since I'm taking a few night classes.  This dinner turned out to be the perfect antidote, after a night or two of grabbing dinner on-the-run.  I wanted home-cooking.  Whole Foods had a special on whole chickens, so this 3-1/2 pound bird cost less than $5.00. Score!

I don't roast a whole chicken very often.  I'm not sure why, but it's most likely that I find them to be a little" Dullsville".   A week ago, I had recorded an episode of America's Test Kitchen, Season 2012.  Craig watched the episode, with me.  According to "ATK', this recipe promised to deliver flavorful and moist chicken-- without brining-- in under an hour.  Really? I'm listening.  That's when Craig told me that he looooves roast chicken.  Who knew?

The first step is to preheat a skillet in a 450 degree oven.  According to ATK, "preheating the pan and placing the chicken breast side up gave the thighs a jump start on cooking."  To prep the chicken, all I had to do was to tie the legs, slather the bird with olive oil and season with salt and pepper.  I then transferred the  chicken, breast side up, to the preheated skillet in oven. I roasted the chicken until the breasts registered 120 degrees and thighs registered 135 degrees, 25 to 35 minutes.

Here's the twist--Turn off oven and leave chicken in oven until breasts register 160 degrees and thighs register 175 degrees, 25 to 35 minutes. This technique was to prevent the evaporation of juices, ensuring moist meat.

While the chicken was roasting, I prepped the ingredients for the pan sauce. Shallots are a staple in my fridge.  They're much milder tasting than onions, and I use them often.  I love tarragon, and we grow it in our herb garden. Parsley would make a fine substitute.

The chicken is cooked to the perfect temperature, so I set it on a carving board and lightly covered it with foil.

There wasn't that much fat in the skillet, but just enough, so I added the shallots and cooked them until softened (about 2 minutes). Next, I stirred in the broth and mustard, scraping skillet bottom with wooden spoon to loosen fond. I simmered the sauce until it reduced to ¾ cup, about 3 minutes.

I turned off the heat, then added the lemon juice, butter and tarragon...

...and gave it a good whisk.

Last, a little pepper to taste... then covered, and kept warm.

We finally got the hang of learning how to carve a whole chicken (which could be part of the reason I rarely roast a whole chicken), by pulling out the leg...

...then learning how to cut the leg away, at the joint. Easy!

I served this with roasted asparagus and mashed potatoes.

I shot these photos in very dim light, but I hope you can see how moist the chicken was. It was juicy!

TASTING NOTES:  As promised, the dinner was ready in an hour.  The chicken was very moist. I loved the pan sauce, but how can one go wrong with lemon and tarragon?    I loved this meal. I loved the simplicity in preparing it, and the sauce was excellent.  The beauty of roasting a whole chicken is that it is cheaper than paying for cut-up chicken-- plus, the carcass became chicken stock, the next day. Double bonus!   America's Test Kitchen does it again-- another keeper recipe.

I have several recipes to share, but tomorrow I'm taking an all-day class.  That means, I'm headed to bed early for a Friday night.  My R&R won't begin until Super Bowl Sunday.  All my plans to make lots of finger foods and a spread of munchies, while my men watched the game,  will have to wait until next year.  Being a Northern California gal, the "9-ers" aren't playing, but it was a close and exciting playoff!  So, I'll make a pot of my famous Chili Con Carne (I have never blogged that recipe), kick up my feet and cuddle with my husband (hoping I won't fall asleep).  I've been very scarce at home, and we need "we time".  Hopefully, I can work on more recipes to share with you-- especially a cake that I baked last week that rocked my world!  Soon... I promise!

A printable recipe card is at the end of this post. 


Slow Cooker Revolution - Easy Barbecue Ribs

I think I'm in the minority of home cooks who doesn't fully appreciate the virtues of crockpot cooking-- until now.  Seriously, I never really found crockpot recipes to be the wonderful time savers that so many people swear that they are.  I don't have time to prep my dinner at 5:00am, when I'm struggling to get ready for work.   When I was first learning to cook, in my early twenties,  I used to grab a can of condensed soup, some raw chicken and I'd plug in that Harvest Gold Round crock pot and call it a day.  Did I just date myself?  I don't cook that way any longer. I like to sear my meats before braising.  So, my slow cooker lived in my garage pantry most of the time, because I wasn't going to prep food in the morning, on a work day.

I'm a huge fan of America's Test Kitchen.   I pondered, for a long while, if I really wanted to buy their  book "Slow Cooker Revolution".  I finally did, and I have to say that there are two particular pros to this book.  For one, the photos are in color, and they are mouth watering.   I also like that the recipes don't use canned soups or mixes.  I bookmarked quite a few recipes, vowing that I would see if I could learn to appreciate coming from work, to the aroma of dinner being ready.   I realized that I should plan my recipe that night before, and maybe I'd like this method of cooking. 

This weekend, I had thawed a frozen 3 pound package of  pork ribs that we bought after the Labor Day weekend.  NOTE: 2 packs of 1-1/2 pound of baby back ribs is recommended.  However, I managed to maneuver my larger rack with a little bit of finesse. Last night, I decided to prepare the ribs with a brown sugar rub.  My game plan, was to keep the ribs refrigerated and then I'd start the slow cooker as I left for work at 6:15am. 


America's Test Kitchen's recipe for the rubs is 3 Tablespoons sweet paprika, 2 Tablespoons brown sugar, 1/4 tsp. cayenne pepper, salt & pepper. However, I had an unopened package of Tyler Florence's Brown Sugar Pork Rub that was given to me at last year's Foodbuzz Blogger Festival.  I liked the ingredients, and they were close to ATK's recipe.  


Generally, I make my own barbecue sauce.  My husband was born and raised in Kansas City, MO.  He really likes this BBQ sauce that I buy at Trader Joe's. I like it, too, and there aren't any scary ingredients.  Really, that's all that is needed to make these ribs.  I like that my slow cooker has a removable ceramic insert.

I buy Reynold's crockpot liners,  and they are one of the best inventions.  Cleanup really is a snap.  Look in the section where you buy plastic wrap and foil.  If you see them, buy them!  So, I set the ribs into my slow cooker, standing, along the perimeter with the wide end down and he meatier side facing the slow-cooker insert wall.   I covered it with the lid, put it in the fridge and went to bed.

Right before work, I poured about 1-1/2 cups of the barbecue sauce all over the ribs and turned it on low.  I had a crazy busy day at work, and came home feeling really tired-- 10 hours later.  The ribs smelled good, and I could tell that they were really tender.  I prepared a baking sheet with foil, set a baking rack on top and sprayed it with olive oil spray.  Removing the ribs wasn't easy, I'll tell you.

I managed to get them on the rack, but a few pieces broke off.  I tented the ribs with foil and then turned on the broiler, and set the oven rack to about 10" below the broiler unit.  In the meantime...

I skimmed as much fat off as I could, from the braising liquid, with a large and wide spoon.  Then, I strained the braising liquid into a pot.   I then set the liquid to a high simmer, for about 10 minutes, until it reduced and got a little thicker.

The recipe said to first set the ribs, meat side down, and then brush sauce evenly over the ribs.  After my difficulty in setting the super tender ribs onto the rack, I wasn't going there. I left the ribs meat side up and then put the whole rack under the broiler... every 2-3 minutes, I'd brush more sauce on the ribs until they looked sticky and crunchy.

I let the ribs rest for a few minutes.

My husband and son were waiting in the wings, as I cut the rubs. They were very tender.


My son and husband are crazy about ribs.  I'm not kidding. Me? Not so much. I'll eat one, maybe two.  My son dug in, first.  My husband followed next. 


VERDICT:  My son said these were the best ribs ever!   My husband was slower to respond.  Undoubtedly, he was comparing them to the ribs he's learned to grill well. I do agree that the ribs were very tender.  His verdict is that they are very tender, and almost smoky. I liked that there was a slight stickiness to the outside of the ribs, and a slightly charred taste from the broiler.  There is nothing like slow-cooked ribs, over wood chips and a Weber grill.   However, I will say that after the rough day that I had at work today-- I'm beginning to see how slow cookers can be my new best kitchen helper.   I give America's Test Kitchen kudos, for this recipe.  Broiling the ribs is key.  Otherwise, these would just be braised meat, and not barbecue.

I'm actually posting this in "real time" folks.  After dinner, I simply removed the crock pot liner and tossed it away.  Clean up was easy for me- which my son and husband graciously did for me.

Here's the recipe:


Support : Creating Website | Johny Template | Mas Template
Copyright © 2011. Delicious Food Kitchen - All Rights Reserved
Template Modify by Creating Website
Proudly powered by Blogger