Showing posts with label Baking. Show all posts

Artisan Bread in 5 Minutes A Day


This photo really is a blast from the past. I think it's one of the first photos I took, when my point-and-shoot finally bit the dust and I upgraded to my new camera. I hadn't quite gotten the hang of how to white balance my shots, and exposure.   I never blogged this post, and it's time that I do; please forgive that some of my shots aren't quite as colorful as I'd like.

Artisan Bread in Five Minutes A Day  has been blogged about over and over again.  If you haven't tried this easy way to bake your own bread, this might calm the fears of those of you who shy away from working with yeast.   See that Danish Dough Whisk?  I used it when I blogged about the Cinnamon Raisin English Muffins that I made.  It's become my new "go to" tool for mixing dough.


The idea is so simple and requires only flour, yeast, salt and water.  I only use King Arthur Flour Unbleached Flour, because it has a higher gluten content...and I don't particular want to use bleached flour, now that I'm more aware of how it's made. (If you'd like to know more about bleached flour, click here.) 

I bought a set of plastic food storage buckets at my local restaurant supply store.  I devote these to making my bread/pizza doughs and store them in the refrigerator.  To mix a batch of dough (that yielded 4 lovely loaves of bread, over the course of two weeks), you just dump the ingredients, with water, into the bucket and mix it together.  Just a few minutes...
Two hours later... the dough has risen and it goes into the refrigerator.   The longer the dough ferments, the more flavor that develops.


To bake a loaf, just cut off a piece of dough (I use my kitchen shears)....


Shape it, let it rise 45-60 minutes and get ready to bake your first loaf of Artisan Bread.


I admit that I did invested in a baking stone.  I bought the one that was most highly rated by Cook's Illustrated, which is sold on King Arthur Flour.com.  At $52.95, plus shipping, it's not a cheap toy kitchen tool, but I use my baking stone all the time.  In fact, I just leave it in my oven.  The baking stone is perfect for making homemade pizzas, because I a beautiful crust.  You don't have to buy one, though.  In fact, I'm going to give you the link for the author's website, where you can watch a video and see more detailed pictures on how to do this.

This is the first, of many, loaves that I've made.  Each time I make a loaf, it gets better. Oh!  There's even a whole wheat version in their Healthy Breads in 5 Minutes a Day.   Each cookbook has recipes that starts with the master recipe-- from cinnamon rolls to beautifully shaped breads.

I want to share the love.  Just leave a comment and tell me if you have a favorite bread you like to make...or, if you've never made bread, that you'd like to try this super easy bread making technique. Just tell me if which book you'd want, if your name is randomly picked-- the first AB in 5 cookbook (uses white flour) or the Healthy Bread (uses whole wheat flour).  They are both great books! Oh, the small print-- I'm sorry, but I can only ship within the United States.  I'll pick a winner, this weekend, and announce the winner with my next blog post. Giveaway has ended and a winner has been chosen.

By the way-- the winner of the Danish Dough Whisk is....Kim, of Stirring the Pot!  Congratulations!  Kim email me at foodwife@gmail.com with your mailing address and I'll get it right out to you!


60-Minute Dinner Rolls (Yes,fresh baked rolls in one hour!)

April Showers have arrived, more in the form of  heavy downpours.  It's all good for our local agriculture, and I love soup on a rainy day.   I've been cleaning out the refrigerator and pantry, and I had some cremini mushrooms that had to be either used-- or tossed.   I settled on making one of my favorite recipes for  Golden Cream of Mushroom Soup.   (The soup gets it's golden color from a little tomato paste and the darker color of the cremini mushrooms.) A salad is always a great side dish, with soup.  But, fresh baked bread is something that makes it even better. 

I found this recipe on my friend's blog, Monica, from "Lick the Bowl Good", while searching for a quick bread recipe.   I decided to cut the recipe in half, because Craig and I don't need two dozen freshly baked rolls to tempt us. 

I didn't photograph the process of making these rolls, because I wasn't sure how they'd turn out.  (In retrospect, I should have grabbed my camera.  Sorry about that.)  They were really easy to make, using a Kitchen Aid Stand Mixer, with a dough hook.  A few of the  "secrets" is to heat up the mixing bowl, get the liquid ingredients to about 110F.  I also like to turn on my oven to "warm" for just a few minutes-- then turn it off.  This makes the perfect incubator to speed up the proofing of the dough.

The dough rose in about 20 minutes!  The dough had a texture similar to my German Rohr Nudeln (sweet rolls with jelly).   You can make clover leaf rolls, but I prefer to cut my dough into square pieces and then shape them into roundish rolls-- well, just click here if you want to see how I shape them. 


I took no more than 10 minutes for me to shape the rolls, and then I covered them for about 15 minutes.  While the oven preheated, I set the rolls on top of my stove.  The warmth of the oven helped to proof the dough.
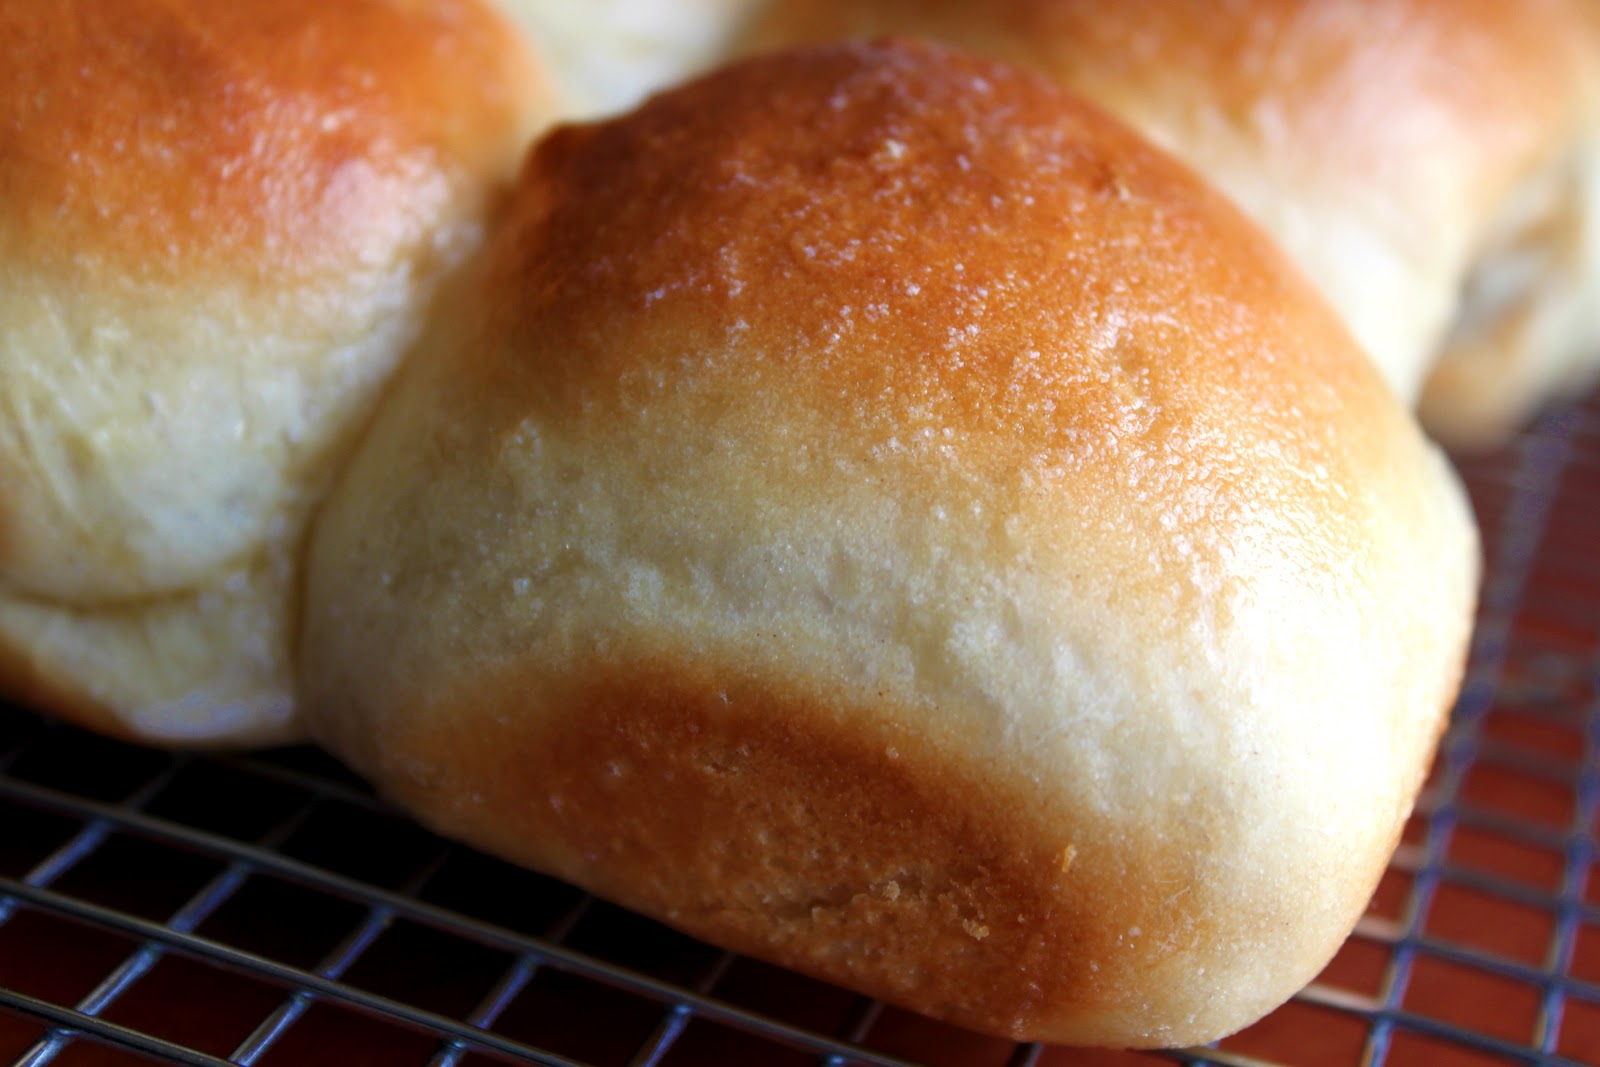
They baked to a lovely golden brown in about 15 minutes.  I brushed a little melted butter on them, then carefully set them on a cooling rack.

I'm not kidding-- in one hour, I baked homemade rolls and made the soup.  Ta-da!

Hot soup and freshly baked rolls, homemade and not from a can-- how comforting is that?!

Fluffy and tender...

TASTING NOTES:  I've made a few versions of dinner rolls, and have posted several on my blog.  These rolls are now my favorite "go to" recipe.  The texture is very tender, and they are just so darn easy to make.  I'm going to play around with the recipe to come up with a whole wheat version.  My son will be sad to see that he missed out on these, because soup and fresh bread is one of his favorite meals.   I'll just have to make it for him on his next day off.  My pleasure!  (Guess what's packed for my lunch box tomorrow, as it will be raining again? )

UPDATE:  I tweaked this recipe, using whole wheat flour-- plus, I decided to photograph step-by-step photos on how to make this. I'll be working on that post, and will link to it-- in the meantime, if you want a whole wheat version, the printable recipe card is at the end of this post or click here.

A printable recipe card is at the end of this post. If you can't view it, click here.


Apple Brown Butter Tart

I'm just going to come out and say this-- I loved this tart. I didn't plan to, but it just happened.  I've written, several times, on this blog that I'm not the biggest fan of pie crust.  My favorite pie is pumpkin pie.  Apple pie doesn't really rock my world.

But, Anne Burrell changed my opinion.  I am quite sure it was the same Food Network show that inspired me to make Cornish Game Hen with Pomegranate Molasses, that also featured this recipe.  I was inspired to make this recipe because I liked the idea of making a brown butter filling, with layers of apples that are sauteed in butter, a little sugar and brandy!  While I'm not a huge fan of pie crust, there's something about a tart that I much prefer-- especially a tart with an all-butter crust. I made the dough a few days ahead of time.  Yes, you can use store-bought, but I can promise you that it won't taste anyway near as good as this recipe. I wouldn't lie about this.

I used a 9" tart pan and rolled it out pretty thin, because I needed to have a lot of overhang. You'll see why, in a moment.  Brown butter takes on a lovely nutty flavor.  My suggestion is to use a pot that isn't dark, so you can better see when the butter goes from yellow...

..to golden.  It takes about 7 minutes to get to that stage, and you have to take the butter off heat pretty quickly-- otherwise, the butter can burn and then you have to start all over. This is the trickiest part of the whole recipe. The rest is easier.  Next, you pour the brown butter into the bowl of a stand mixer (or, you can use a hand-mixer).  Add all-purpose flour, eggs and vanilla bean.  In my case, I use vanilla bean paste.

Pour the filling into the tart pan.   I found it interesting that the original recipe says to use 2/3 of the filling, and to save the rest for another tart.  I used almost all of it, with maybe 1/2 cup leftover.

I used five apples, instead of six.  I used a combination of Jonagolds and Granny Smith.  If you have an apple, corer, slicer then it's fast and easy to do. You want the apple slices to be fairly thin.  In a skillet, melt 2 tablespoons butter and 2 tablespoon sugar.

Cook the apples until just tender.  I'm adding one of my favorite products (purchased at King Arthur Flour) of boiled apple cider).   I don't drink brandy, but I buy those small "airline size" bottles of liquor for times when I need it.  You can learn out the brandy, of course.  I poured 1/4 cup, tilted the skillet and lit it up!   I didn't photograph the flames, but they were there.  If you're too scared to do that, the alcohol will burn out on it's own.  Last, I added some golden raisins, gave everything a toss...

Using a slotted spoon (there was liquid in the skillet, and I didn't want to dilute the filling underneath), I spread all of the apple filling.  Then, I gently folded over the overhang of the pastry.  I brushed the dough with an egg wash and then sprinkled some sanding sugar. Set it on a baking sheet and bake at 350F for about 45 minutes, or until golden brown.

Bee-ooo-tiful!

My only disappointment was that the tart got stuck in the pan.  I prepped the pan well, but I didn't get the pretty ridges that most tart pans product.  Small details, though.

After 30 minutes of waiting for the tart to cool, I realized I was starting to lose natural lighting.  I can't think of a better excuse for digging in.


TASTING NOTES:  First, the pastry crust-- buttery, tender, flaky.  I'm a very happy baker. The filling-- I can taste the subtle kick of the brandy (whoopee).  The apples aren't super sweet, and the filling is very subtle.  I taste butter, apple, sweet, slightly tart and just genuine deliciousness.   My son exclaimed this to be a five star dessert.  I had plans to make fresh whipped cream, but I changed my mind. I don't think this tart needed anything else to make it better.

C'mon, do you see the layers of pastry?  The filling at the bottom?  Would you believe the whole tart was gone by the next day, after breakfast?  Yeah, it's that good.  I love the brown butter filling, and I have ideas of using pears and maybe adding a little almond extract to the filling. Yeah? Yeah.

Anne Burrell is my gal.  So is Ina and Tyler.  But, I'm definitely on an Anne Kick these days. I have her debut cookbook, and am loving it. I can't wait to find more time to dive into those recipes.  A printable recipe card is at the end of this post.


Apple Brown Butter Tart

        <p>This tart is one of the best apple recipes I&#38;#39;ve made in a very long time. The pastry is tender and buttery and &#8230;oh, so good!  Patiently browning the butter, which is blended with eggs, flour and vanilla beans is worth the effort.  Fresh ...    

        See Apple Brown Butter Tart on Key Ingredient.    


American Pie Crust - A quirky, but succesful, method from King Arthur Flour

American Pie.  The pie crust is the key, isn't it?  It is to pie lovers, like my husband.  My son, too.  A pie crust has to be tender and flaky.  Am I right?  The debate goes on as to which is better-- an all butter crust vs. using shortening.  In my beginning baking years, I used to buy Mrs. Smith's frozen pies.  I was too intimidated to try making pie crust, from scratch.  Then, I transitioned to buying ready made pie crusts.  Eventually, I started to make pie crusts with my food processor.  I'd whir the dough around for an eternity, not realizing that I was doing a fabulous job of building up the gluten.  My pie crusts were tough, but at that time I didn't really notice. That's because  I don't eat the crust.  I'm one of those pie eaters, who scoops out the contents of the pie and tosses away the rest.

I married a man who loves pie. He loves pie crust. A lot. Seriously. He could eat pie for breakfast, and be totally content.  His favorite summer pie is "Olallieberry Pie".  I shared this all butter pie crust (from Ina Garten) as a tutorial (and it's gotten a lot of views).

In the Fall, I believe that Pumpkin Pie is one of the most traditional desserts that graces a Thanksgiving table.  Pecan comes in as a close second. Some years, I like to try new pumpkin desserts-- like Pumpkin Ice Cream, or Pumpkin Pana Cota.  This year, I wanted to make traditional pumpkin pie.  I wanted to try the shortening and butter approach of making a pie crust.  One of my most trusted internet  recipes sources, King Arthur Flour, had several pie crust recipes.  I watched their video, and I was totally sold on making a pie crust without a food processor!     There are four kitchen tools/supplies that you need, for this technique--  a rolling pin, parchment paper, a pastry cutter (you could use two forks)  and and a spray bottle. For those of you who say you hate to bake-- and worse, that believe you can't make pie crusts...  watch and see.

I've own a pie crust shield for years, to prevent my pie crusts from turning too dark.  The problem is, it ruins my pie crusts because I tend to use a deep-dish pie plate.  I now prefer to roll foil to fit my pie plate.  Spray the pie plate, so that the pie slices are easier to remove. You're welcome.

Measure your 3 cups of unbleached flour (of course, I only use King Arthur Flour), salt  and 1/2 cup shortening (a printable recipe card is at the end of this post).  Cut the shortening in until it's the size of small peas.   I have to admit, it wasn't hard work at all.

I usually grate my cold cheese. But, like the recipe instructed me to, I cut the butter into thin slices and added it to the coarse flour and shortening.  Very gently, with my hands, I mixed the butter with the flour. Then broke the butter to about the size of my thumbnail.

 Ice water is important-- not cold tap water.  The recipe said between 6-9 Tablespoons of water.  I quit at 9 Tablespoons, while stirring it with a fork.  I wasn't quite sure when to quit-- as the recipe said to quite when the dough is "shaggy" and "almost moist".  So, remember that parchment paper and spray bottle I mentioned?  Here's the quirky part:

Spread the shaggy dough on top of parchment paper.  Take one side of the parchment paper and fold it over the dough and press down. 


See? The dough is a bit dry, still (I should have added one or two more Tablespoons of water.)

Now spray with water, until the dough is moistened.  The theory-- which makes complete sense to me, now-- is that we are not going to overwork the dough.  We also want to allow those pieces of butter to stay whole.  I press the dough, almost like a letter, to build layers.   Finally, it all came together.

 I cut the dough into unequal halves. Why? Because one pie plate is deeper and larger than the other!

I'm holding a cross section.  Those will become tender layers of flavor. I totally have faith in that.

Gently pat the dough into a circle, wrap in plastic, refrigerate,  and allow to rest for at least 30 minutes.  You can certainly make the pie crust dough several days in advance.

 Rolling pins... I have finally fallen in-love with my tapered rolling pin.  As long as I run a little flour over the rolling pin, I don't have a problem with the pie dough sticking.

I finally mastered the simple art of rolling pie dough.  Start from the center and roll out.  I no longer roll back and forth, and now my pie crusts don't stick and they aren't tough, from being overworked. One last tip-- turn the dough a quarter turn.  If the dough sticks, then add a little flour underneath.  All my broken pie crust problems have been solved!

Can you see that nice chunk of butter in the right corner?  It's simple science-- the butter causes the crust to steam = tender and delicious crust.   I find that wrapping my pin around the dough, and then unwrapping it onto my pie plate works perfectly-- every time.

My crust was a little unevenly shaped. I simply took some excess trimmings, and added it underneath the area that needed more.  Crimping will hide that patch job.

It's fun to play with my food.

Here's a more traditional crimp.

Here's how I did it, from an earlier post for a two-crust pie.

For my second pie, I snipped the dough with kitchen shears...

That's kind of fun-- a checkerboard crust.

FINAL NOTES: The prepared pie crusts should be chilled for at least 30 minutes before using. Yes, you can freeze these as well, and use them another time-- like the day after. 

I simply don't see a need to buy pre-made pie crusts.  Have you read the ingredients lately?  I actually find pie crusts on the therapeutic side to make.  There's something really satisfying when I roll out a pie crust and crimp it.  It feels like a true accomplishment.  Of course, the question is-- is this a good recipe?

VERDICT:  This dough is very easy to work with, and rolls out beautifully.  I found the pie crust to be truly tender.  My husband really liked the pie crust a lot.  He says it's just like his mom's old-fashioned pie crust. I still am a big fan of all-butter crusts, and I'm a tart kinda gal.  I gave my husband the crust, and gutted the pumpkin pie.  Considering I had some rather generous helpings of my revised sweet potato casserole (coming up soon), that was probably a better idea.

Here's a sneak preview to the pumpkin pie recipe, that was new to me.  It was excellent.  Yes, I will be sharing that one, too.

I was hoping to embed the King Arthur Video on this post, but I'm a little leery about playing around with HTML codes within my template.  So, instead, here's the link to see this really cool pie crust technique.

A printable recipe card is at the end of this post, and at the end of the video.

I keep saying-- King Arthur Flour doesn't pay me to promote their products, website or recipes.  I do it, because I'm a very happy customer, and I have great results with their recipes.  Plus, they're nice people to deal with on the phone.


Support : Creating Website | Johny Template | Mas Template
Copyright © 2011. Delicious Food Kitchen - All Rights Reserved
Template Modify by Creating Website
Proudly powered by Blogger