While I'm dreading the jet-lag fatigue I'm going to feel tomorrow morning, I know it will last only until next weekend. At least, I hope so. No, I haven't returned from a trip in another time-zone. I'm talking about the hour of extra sleep that has been taken away from me as we "Spring Forward". My alarm goes off at 5:00am, and the only thing that stands between my sleepy stupor and oversleeping, is a very hot shower, and a cup of dark bold coffee to sip on the way to work at 6:15am. The pay-off, of course, is that we food bloggers can take advantage of longer days and better natural light photographs, as we gain an extra hour of daylight.
Do I hear an amen?
I'm thinking that my energy is solar-powered. When daylight is short, I find that I have less energy. As the daylight lasts longer, I have the energy to come and swim laps, tidy the house, and cook. I remember when my son was young, and I was driving him to baseball or golf practice-- that I could hardly wait for him to get his license and I'd have more time to myself. Now that he's a grown adult, has his own car and job, I still find that time flies by much too fast. Yikes, I'm starting to sound like my own mother!
I so love my food blog, as my creative outlet, and I have missed not being able to find time to edit some of the desserts, breads and savory meals I've made, over the last few weeks. I spent this whole weekend in a classroom, taking job-related classes, and haven't been home for very long. Before I go to bed, I wanted to share this very fast recipe because I've been making a lot of those lately. After all, I much prefer a home cooked meal over take-home.
My son (who usually works nights) was home, for a change. He asked if I could possibly make teriyaki chicken. I didn't have teriyaki sauce, and so I thought I'd see how fast google would find a recipe for me. I landed on food.com and found a recipe that listed all the ingredients that I had on hand. I didn't really plan on photographing the recipe steps, but once I tasted the sauce-- I grabbed my camera and knew that I had to share it. I'll make it again, as it did the trick!
The ingredients list includes soy sauce, water, cornstarch, ground ginger, garlic powder, brown sugar and honey. Okay, I admit that this isn't what Japanese food purists would deem to be authentic. The sauce came together in less than 10 minutes, while my rice cooker was taking care of the starch.
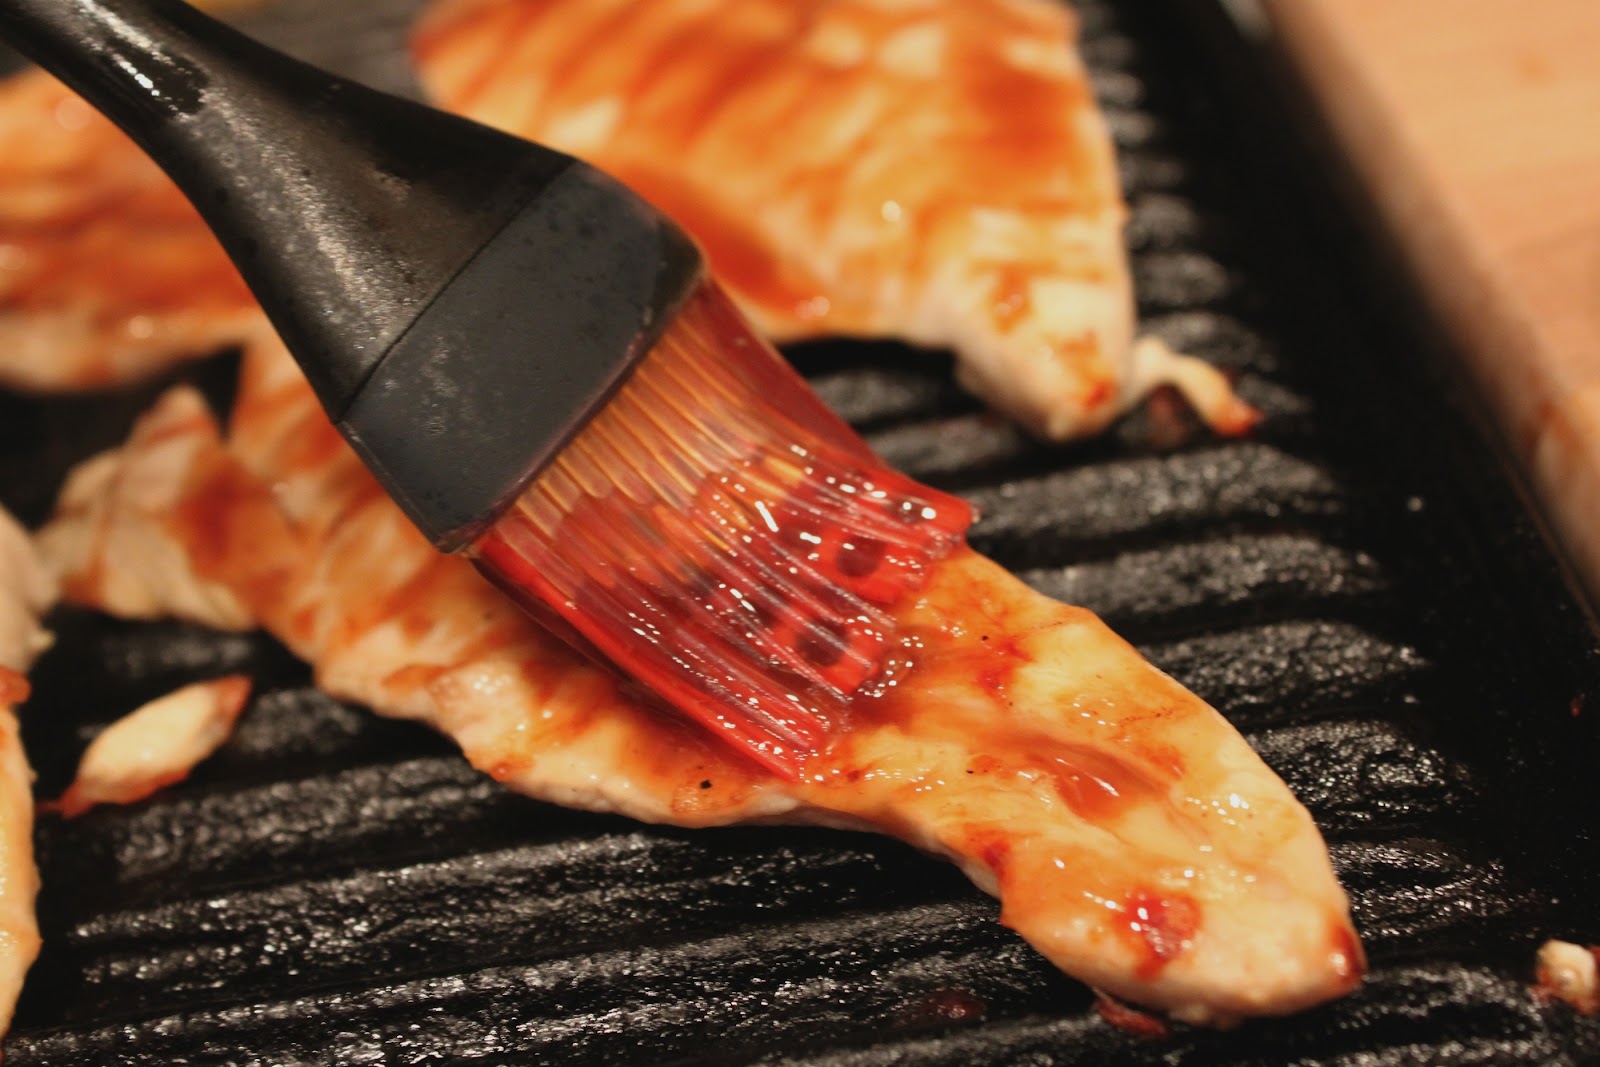
Our Weber is still covered and stored away until summer is in full swing, so I used a stovetop cast-iron grill. I usually have chicken on hand, so I grilled some boneless chicken breads and glazed them with the sauce.
I also had a few fresh pineapple spears (one of my favorite morning snacks is fresh pineapple and cottage cheese... love it), so I sprinkled them with some brown sugar and added them to the grill.
Rummaging around in the vegetable bin, I found some green onion as well. Dinner was on the table in under 45 minutes. Maybe this isn't the prettiest dinner to look at, but it meant the world, to me, that I fulfilled my son's request.
TASTING NOTES: The sauce is thick and flavorful, and I'll never buy bottled teriyaki sauce again. I've bookmarked more authentic teriyaki sauce recipes that uses mirin and fresh ginger, so that I can have a comparison. But, when that craving hits, this is a fool-proof and easy sauce worth trying. Neither my son nor husband likes grilled pineapple. I love it, and I didn't mind that the brown sugar had caramelized. (They have no idea what they're missing out on.)
Yay! I got a post to share with all of you finished, and now I can get ready to go to bed. Problem is, my internal clock is saying it's too early. See what I mean? Jet-lag. Am I the only person who struggles with making this adjustment?
A printable recipe cards is at the end of this post. NOTE: Key Ingredient is working on upgrading their new recipe card format. If you are using Internet Explorer, you might not be able to see the card. If that happens, click here to see it on Key Ingredient.
On most week nights, I still come home wanting to eat home-cooked food-- as opposed to bringing home take-out. I'm pretty much the Chief Cook in the house, and I need meals that come together quickly. I often resort to pan-searing meat and making a pan sauce. I love pan sauces. They transform boring old chicken, pork or beef into something that resembles restaurant quality food. It couldn't be simpler. When the Pioneer Woman recently posted this recipe, I knew that this would be dinner. That very night!
I stopped by my meat market, and picked up two luscious pork loins. I already had the rest of the ingredients on hand-- red wine, garlic cloves, beef broth and balsamic vinegar. So, here we go-- the pork is seasoned with coarse salt & black pepper. Then it's seared in a screaming hot skillet with a little oil and unsalted butter.
I did something a little differently that "PW" does... I prefer to sear my meats on one side until golden brown, and then put them into a 425F oven to roast them. (I already had baked potatoes going, so it was convenient to do this.) This method pretty much assures me that the meat will be moist. I roasted these for about 4 minutes, then removed them and lightly covered them in foil. (Otherwise, just flip them more a few more minutes, because you'll finish cooking the pork in the sauce.) To the skillet, I added about 8 peeled cloves of garlic, and tossed the about on medium heat until golden brown. Look at all the brown deliciousness on the bottom of the pan...flavor, just waiting to happen!
So, now I add some red wine, a bay leaf and let that bubble and reduce for a few minutes. Last, I add some beef broth and the chops and let them simmer for a few minutes more.
I add a bit of balsamic vinegar, and swirl the pan a bit...
For a final ta-da, I turn off the heat and add some unsalted butter and whisk it in.
I served this with a baked potato, and a salad with a light white balsamic vinaigrette.
TASTING NOTES: I do consider pork to be the "other white meat" and we love it. I realize that this isn't exactly a child-friendly dish, but my baby is already a grown young man. The garlic was sweet, and cooking it removed any kind of strong garlic "bite". I wish I had added even more garlic cloves. The sauce was so flavorful, with that very subtle tang of balsamic. Loved this dish. Love, love. This recipe is going into my regular rotation for those nights when I'm hungry, but tired. Super easy to make, and good enough to serve company for dinner. Thanks, Ree!
A printable recipe card is at the end of this post.
Here I am. T-minus 3 days until the family comes over for dinner. All three of them. Sometimes I wish an Italian family would invite me over for dinner. I'd bring a side dish and dessert. I'd love the noise and to experience having 20 plus people for a holiday dinner. So, where was I? As for me, I only need five place settings. Of course, that means lots of leftovers. That equates to no cooking for me, for a day...or two. For years, as soon as the turkey came out of the oven, I'd jump into making the gravy. It's a crazy time to do this, because all the other dishes are coming out of the oven, from the stove, and my guests are hungry. Finally, I read an article in a magazine about Make Ahead Gravy. Brilliant! I've been doing this for four years, and it's such a blessing. Trust me.
One of my dear coworkers lamented that she can't make gravy to save her life. I wonder why? Gravy is one of the easiest things to make. You just have to follow a few basic rules. For one, it's that "brown stuff" that sticks to the bottom of the roasting pan that has gives gravy such great flavor. In culinary terms, it's called fond. To me, it's gold. Next, you want a rich and flavorful stock, and fond is what makes it happen. Water doesn't cut it. Last, but just as important, you need to know how to thicken the gravy. This is where the lumpy gravy fear factor comes in. Oh, I've made plenty of lumpy gravy over the thirty plus Thanksgiving Dinner's I've made. 'Nuff said. Let's make turkey gravy:
First, we're going to make the turkey stock. I bought six turkey wings for less than $8.00. Place them in a roasting pan (or a Dutch Oven). Add a couple of onions, cut into chunks, and a few sticks of celery. You don't have to bother peeling the onions or garlic.
Roast the turkey wings in a 375F oven for about 2 hours.
It smells like Thanksgiving, already.
Add about 8 cups of water.
...add a couple of Bay Leaves.
I like adding peppercorns to my stock.
I love this mesh tea ball. Cheese cloth works fine. It just makes removing the peppercorns easier.
Bring to a boil...
...then simmer for at least an hour.
Remove the turkey wings and chunks of vegetables. My husband saves the turkey meat for our kitty. Isn't he sweet?
Strain the turkey stock, and refrigerate overnight (or at least for several hours.) If you really think about it, I just taught you how to make your own chicken or turkey stock. Rather than adding raw chicken, I always roast my meat first. I think it gives the stock a richer color and deeper flavor. So, it's time to make gravy!
TRUE STORY: Four Thanksgivings ago, I strained my turkey stock right into the sink. I shrieked, the moment I dumped it in. I was thinking "pasta". I wanted to cry. Lesson learned: always have that pot ready underneath the strainer.
There wasn't a lot of fat, which was a nice surprise. I used a large spoon to skim off the thin layer of fat.
This is the secret to silky and lump-free gravy, folks. First, have your tools ready. You need a whisk. Don't have one? Buy one! We're going to make a "roux", which is equal parts butter and equal parts milk. I use whole milk. Non-fat and low-fat is a no-no. I mean, really? It's gravy, people. It's a holiday, so enjoy and work out later. Yes, there's cognac in this shot. I wanted to make a batch of gravy with cognac in it, and another batch with a splash of apple cider vinegar. Measure out the flour and milk (6 Tablespoons flour, 6 Tablespoons unsalted butter) and 1/2 cup whole milk. Have the stock nearby, and start melting the butter. Get your whisk ready. Thank you to my husband, who took these "action" photos so I could make this gravy with both of my hands.
I used a non-stick large pot, to melt the butter on medium-high. While whisking, I began to add the flour-- don't dump it all at once. Just start pouring it in, while whisking. Yes, the theme is to WHISK the whole time. Don't stop! We're cooking that raw taste out of the flour.
Whisk, whisk, whisk... no lumps. Now, start adding the stock it. How much? Go easy. I add it one cup increments, and whisk, whisk, whisk. Keep the gravy just below boiling, and you can tell when it's thick. Leave room for milk...
I added one Tablespoon of Cognac to the first batch. The second batch I added 2 teaspoons of Apple Cider Vinegar. Now, add the whole milk and keep whisking.
TIP: So, you realize you added too much liquid and the gravy is too thin. Don't panic. Just don't fall apart and add flour straight into the thin gravy, or the lumps will come. I am speaking from experience, here. It's not pretty. Instead, you can mix about 1 Tablespoon of corn starch and whisk a little water into it, till it's lump free. Now, very slooooooooooowly, add the cornstarch and whisk while the gravy bubbles. Cornstarch works very fast, so go easy. If it's still not thick enough, then add some more. Oh. If you have Wondra instant flour, then you can carefully add that to gravy to thicken, but whisk like crazy. In the end, if there are still lumps, just strain the gravy through a fine mesh sieve.
You have to season the gravy. I use only coarse salt-- never table salt. I add salt in 1/4 teaspoon increments. Add. Taste. Add a pinch more. Taste. Are you double dipping the spoon? Tsk, tsk. I always use a handful of spoons. See? It's safe to eat my food. (Just ask my family what kind of germophobe I am. Ha!) Pepper is optional. I like adding it to my gravy. Leave it out, if you don't. So, there you have it, ladies and gentleman. Thick gravy, no lumps. Tastes good, too. I have two quarts of gravy and almost a quart of leftover turkey stock.
VERDICT: I asked my husband to taste each batch of gravy and choose his favorite. He liked the one with apple cider vinegar more than the one with brandy. I have to agree. The brandy was a good idea, but I was surprised that I liked the cider vinegar best. It's very subtle, but kicks up the flavor just a bit more. I thank the food blog "Noble Pig" for inspiring me with this ingredient that I would never have thought of.
So, the day has arrived to roast the turkey.
You can either placed the chilled (or frozen and thawed) gravy into a crockpot or on the stovetop on medium-low. Simply strain the drippings...
...and whisk in the strained turkey drippings.
The gravy stays nice and hot in a crockpot. Or, simply leave it on low on the stovetop. You will love not having to fret about making gravy, while you're scrambling to get the rest of the dinner out to your guests.
The additional turkey drippings gives an even richer color and flavor to the gravy.
Now, that's what I'm talking about!
FINAL TIPS: Leave extra stock. When reheating gravy, you can use it to thin out the gravy if it's turned into concrete. You can freeze the gravy for weeks to come...or refrigerate it for a few days.
I'm telling you. Gravy is easy to make. Who needs packets? Really? That canned stuff? The ingredients scare me. C'mon, you can do it! If you do, and it works, I'd love to hear from you.
It's bedtime, folks. I'm cooking and blogging in real time. My Make Ahead Mashed Potatoes are all set to go. All I have left to make, tomorrow, are pie crusts and my cornbread stuffing (I baked the cornbread, from scratch, last night). I made my cranberry-orange relish two months ago, and canned them. Wednesday, I bake my sweet potatoes for my casserole and I think Thanksgiving Day will be a lot let stressful than it's ever been. For once, I want to be enjoying time with my family in my own living room.
As always, a printable recipe is at the bottom of this post.
I love adore Italian food. That explain why I can't stick to a no-carb diet. To me, pasta is a vehicle for sauces. It's also a fool-proof way to clean out my vegetable bin. I have only one off spring-- a boy 22 year old son. Living with my husband and son, pasta is something I make year-round. Now that I've mastered making a quick marinara sauce, I don't buy bottled spaghetti sauce. Amen to that! I've always wanted to make Bolognese sauce. This sauce is simmered, long and slow, for hours. I'm not opposed to doing that, but my slow cooker has been sitting idle for a very long time Enter the test kitchen at Cook's Illustrated--who also produces one of my favorite cooking magazines, "Cook's Country "--and I finally made the decision to make my own Bolognese sauce. There are many versions of making this sauce. Several include Pancetta, but this recipe uses ground beef and pork. I prepared finely chopped carrots, celery and onion.
Freshly chopped thyme, 3 cloves of minced garlic and 3 Tablespoons of tomato pasta is ready to begin...
Heat butter in Dutch oven over medium-high heat until foaming. Add onion, carrot, and celery and cook until softened but not colored, about 6 minutes. Add garlic and tomato paste and cook until fragrant, about 1 minute.
Add meat, 1 teaspoon salt, and 1/2 teaspoon pepper and cook, breaking up meat, until crumbled into tiny pieces and lightly browned, about 5 minutes. Add milk, bring to vigorous simmer, and cook until milk evaporates and only clear fat remains, 10 to 15 minutes.
(It's not pretty, waiting for the milk fat to evaporate.) Why milk in a sauce? I think it's the lactic acid that is supposed to help tenderize the meat.
Next, two 28-ounce canned tomatoes need to be pureed in a blender/food processor until smooth...
Add wine (I used a dry white Sauvignon Blanc), tomatoes, and thyme; cover and bring to boil.
Transfer mixture to slow cooker, cover, set temperature to high, and bring to boil. I love the slow cooker bags that I find at my grocery store. They really do make cleanup much easier! We're cooking this on HIGH, bringing it to a boil. Why? According to the Cook's Country article, we want the extra liquid to evaporate, so we don't get a watery sauce.
Once mixture comes to boil, remove lid and simmer until sauce is very thick, 7 to 8 hours.
Make Ahead This recipe can be partially made the night before so that it’s ready to place in the slow cooker in the morning. Complete steps 1 and 2 and refrigerate the mixture in the Dutch oven. The next morning, bring the mixture back to a boil, transfer it to the slow cooker, and proceed as directed.
The aroma that wafted through our kitchen was making my mouth water. When I checked on the sauce, I didn't like all the fat that had floated to the top.
My sister-in-law gave me this "fat mop" as a gift, a few years ago. I love it! It quickly soaks up the surface fat and then it "squeegees" it away!
TASTING NOTES: I think it's my slow cooker that doesn't get hot enough to boil the meat sauce as much as it could have. I thought the sauce was still a bit thinner than I'd like. I remedied that with a mixture of flour/water, and I added it a little bit at a time, until it reached my desired thickness.
We were so hungry, by the time the sauce was ready, that I plated it without even thinking of making it photogenic. I only had spaghetti noodles on hand, and I was disappointed that I didn't have a more tagliatelle or fettuccine noodles. But, let's talk about the sauce... TASTING NOTES: What I love best about this Bolognese, is that it tastes just like the one I've been buying from a local Italian restaurant (they have a take-out section). The tomato flavor takes a back seat, and it's the wine that shines through. The texture of the meat was, indeed, very tender. This recipe makes 12 cups of sauce, so I froze two 4-cup portions.... this was about 2 months ago!
I have always wanted to buy an Atlas Pasta Machine. I spotted a gently used Atlas Pasta Machine Set on eBay, and the highest bid was at $50.00. For a new machine, the best price I could find was about $200.00. (I must admit, that I've acquired a wicked technique that usually results in my winning most eBay auctions that I want. It's a closely guarded secret!) I won the auction, and I got the whole pasta machine set for $60.00!!! For a couple of weeks, I felt hesitant to make my own pasta-- as I had never done it, other than the Sardinian Gnocchi that I made, some time ago.
We've had unusually unpredictable California weather, during the month of May. Some days have been warm and sunny, and others have been overcast and drizzly chilly. Last week, it was raining and so I decided to just dive in and figure out how to use the pasta machine. I giggled, as I made rolled my first successful set of pasta! (I made a basic egg dough.) I was delighted to find out that it's not that hard to make pasta, and I'm very excited to make more! So, I thawed a container of the frozen Bolognese sauce...
What I love about freshly made pasta, is that it cooks in just a few minutes...
TASTING NOTES: I thought the sauce tasted even better! Spaghetti noodles really don't do justice to this sauce. The thicker noodles carry this sauce. The homemade pasta, glass of red wine and this sauce was so comforting. We loved it! I was so pleased that I had learned to make two more classic Italian recipes. I think that Cook's Country has done justice to the Italian community. I do think that this sauce would be just as good, if simply simmered on the stove top. However, for full-time working cooks (like me), I think it work to do the prep work the night before and then let it simmer in a slow cooker. There is no way that a commercially, bottled sauce can come close to the homemade flavors of patiently cooking vegetables, patiently cooking the meats and using fresh herbs. To be honest, this sauce tastes just as good as the Italian restaurant I used to stop and pay $8.00 for a quart of this. Sure, this recipe is a bit fussy. But, so am I! (A printable recipe card is at the bottom of this post.)
GIVEAWAY: I almost forgot! On my last post, featuring grilling recipe ideas, I announced that I would give away a copy of Steven Raichlen's "How to Grill". Using Random.Org, the number "16" came up. Oh, wow! Cathy of "Wives With Knives" was the winning comment. She said:
Improving my grilling skills is at the top of my to-do list this summer. I'm going to start with that scrumptious looking tri-tip. You share so many wonderful recipes and grilling tips and you've inspired me to keep at it.
Congratulations, Cathy! Please email your shipping address to foodiewife@gmail.com. I'll get that book out to you right away. I think you'll love it! Thanks, everyone, for your fun comments.
I hope that everyone had a relaxing Memorial Day Holiday, and that we are not forgetting what this holiday is all about . My gratitude is for those who have given their lives for our country. Thank you, thank you! This holiday is really all about you.




 " as a gift, a few years ago. I love it! It quickly soaks up the surface fat and then it "squeegees" it away!
 on eBay, and the highest bid was at $50.00. For a new machine, the best price I could find was about $200.00. (I must admit, that I've acquired a wicked technique that usually results in my winning most eBay auctions that I want. It's a closely guarded secret!) I won the auction, and I got the whole pasta machine set for $60.00!!! For a couple of weeks, I felt hesitant to make my own pasta-- as I had never done it, other than the


 ". Using Random.Org, the number "16" came up. Oh, wow! Cathy of "


