Showing posts with label Favorite Recipes. Show all posts

Baked Coconut Chicken with Apricot Dipping Sauce

This week, I'm relishing a vacation with my husband.  We're not traveling far. In fact, we're enjoying the sights (and restaurants) in our own backyard.   When I'm "Stay-cationing", Craig and I will dine out more often than usual. We prefer a having a leisurely lunch in places like Big Sur, Carmel Valley or Pebble Beach.  We'll make a pit stop, or two, that are errand driven.
Yesterday, we had a busy day, and I was happy to arrive home by late afternoon so that I could catch up on reading magazines and new cookbooks.  Before I knew it, my stomach was telling me that it was 6:00 and I needed to think about making something for dinner.

 Follow Me on Pinterest

I had some chicken breasts in the fridge, so I looked for inspiration on  Pinterest!   If you haven't come aboard on the Pinterest craze, be warned that it's an addicting website.  I have discovered all kinds of new blogs, and it's fun to see what my other blogger friends are pinning.  Thanks to my blogger friend Cathy, at Wives With Knives, she had pinned a recipe for Coconut Chicken (from Pennies on a Platter)  that looked easy and appetizing.

The recipe had simple ingredients, that I had on hand--  my chicken breasts were quite plump and large.  So I cut them in half, because I didn't want to wait 30-40 minutes for the chicken to be ready. NOTE: You could easily cut the chicken into bite-size bits, as appetizers

I had a bag (of rather outdated, to be honest) sweetened coconut, flour, salt & pepper and garlic powder.

I had one last jar of my homemade apricot-pineapple jam.  The recipe listed apricot jam, but my absolute favorite jam is apricot-pineapple.  I must make more, this summer.  Anyway,  I added two tablespoons of Dijon mustard, to 1/4 cup of jam.  I felt that was just a little too much Dijon for my liking as it overpowered the delicious flavor of the jam.  I simply added another 1/4 cup of jam, and all was good.  To be honest, I think just pure jam would have been just fine-- more on that later. I set it in the fridge to chill.

Preheat the oven to 400F.  

I beat two eggs (the recipe called for one, but I didn't want to run out) and then dip the chicken into the dry ingredients.

Coat each piece of chicken, and gently press the coconut mixture.

Place the chicken on either parchment paper or a silicone baking mat.  

The instructions said to melt 1/2 cup of unsalted butter.  Necessity is the other of invention, because to my horror, I realized I was almost out of butter!  I melted my last 1/4 cup of unsalted butter and added 1/4 cup of extra-virgin olive oil.  (I think that could be reduced.)

Then drizzle over each piece of chicken..

Done!

A little messy, but it's ready to go into the oven.  I set the timer for 15 minutes.

...then flipped them over.

They were lightly golden.  Can I leave well enough alone? No! 

I wanted extra-crunch, so I turned on the broiler and placed the rack on the highest position. Coconut can burn fast, so I watched the chicken closely-- after 2 minutes, I flipped them over.

I present to you extra-crispy coconut chicken.  In less than 45 minutes from start to finish-- including photographing, and wiping off flour and egg from my camera.

 This is family friendly.  Kids would love it, too.

TASTING NOTES:  I dedicate this recipe to my BFF of 35 years.  Patty loves coconut, and I am absolutely sure that she would love this dinner.  This dinner is really fast and easy to make. I loved the crunchy texture of the coconut.  The apricot-pineapple jam was perfect with each bite. Craig loved it, too.  For a moment, I thought that shrimp would be a great substitute, but I'd be afraid of overcooking it. There's nothing worse than rubbery over-cooked shrimp.  I'll stick to chicken, and I will definitely make this again.  Make this. Seriously. It's lip-smacking good with plain white or coconut rice.

Thanks "Pennies on a Platter" for sharing this recipe.  I love Nikki's blog, with her beautiful photographs and mouth-watering recipes. Had it not been for Pinterest, I might not have found her.

A printable recipe card is at the very end of this post.  If you can't view it (on Internet Explorer), click here to be directed to Key Ingredient. 

Enjoy!
 

Lemon Chicken Breasts. "How Easy is That?"

Springtime and Lemons.  Works for me!   Thanks to my husband's efforts to nurture and take care of our Eureka and Meyer lemon trees, I can enjoy one of my favorite citrus flavors.  I've been enjoying this season's shows on Food Network's "Barefoot Contessa" because she is featuring recipes from her recently released cookbook "How Easy Is That?" 

This particular cookbook become one of my favorite choices when I am searching for inspiration for quick and flavorful meals.  As Ina promised, this is a very easy recipe to make, and my whole family loved it.

We have an herb garden, and our thyme is thriving.  you also need fresh garlic-- like 9 cloves!

Begin by zesting 2 lemons, and finely chopping the garlic.  Next, squeeze 2 Tablespoons of lemon juice and set that aside. You need 1/4 cup of olive oil. Warm the olive oil in a small saucepan over medium-low heat, add the garlic, and cook for just 1 minute but don’t allow the garlic to turn brown.

 Off the heat, add 1/3 cup dry white wine, lemon zest, dried oregano*, thyme, and 1 teaspoon sal. *Ina says that fresh oregano would be too overpowering.


...add the lemon juice.


Here is where I took a small detour from the recipe.  I used chicken breasts, bone-in, instead of Ina's suggested boneless chicken breasts.  Why?  I was being cheap thrifty, and decided that I didn't want to pay for boneless chicken.  After seasoning the chicken, I quickly seared them, because I wanted to be sure to have a nice brown color. You can view how to do this below, from the Rouxbe Online Cooking School:


Otherwise, skip this step and pour the sauce into a 9 by 12-inch baking dish.

Then, pat the chicken breasts dry and place them skin side up over the sauce. Brush the chicken breasts with olive oil and sprinkle them liberally with salt and pepper.

Cut the lemon in 8 wedges and tuck it among the pieces of chicken.

Bake for 30 to 40 minutes, depending on the size of the chicken breasts, until the chicken is done and the skin is lightly browned.

 The aroma will make your family run to the dinner table.  Note: If the chicken isn’t browned enough, put it under the broiler for 2 minutes. Cover the pan tightly with aluminum foil and allow to rest for 10 minutes.
Sprinkle with salt and serve hot with the pan juices.

 I served this with brown basmatti rice and steamed broccoli.  Delicious!

TASTING NOTES:  Next time, I'll pay extra and use boneless chicken breasts. De-boning and slicing the chicken was a bit of a hassle for me!  Plus, the presentation is much prettier with boneless chicken breasts.  I also realized that this recipe reminded of another Ina Garten recipe I've made before-- Baked Scampi!

This is a great weeknight family dinner, or can be fancy enough for a dinner party.  How easy is that?

A printable recipe is at the very  bottom of this page.  I recommend buying the book, though. There are lots of great recipes!

Note: I have recently become a Rouxbe Cooking School affiliate partner. Rouxbe is the world's first-ever online cooking school. I partnered with Rouxbe to help you improve you cooking skills. As part of their affiliate program, I have the power to give you a free, full-access, no-videos-barred, 14-day pass to their site. All you have to do is go to the Rouxbe Online Cooking School and redeem the 14-day Gift Membership. After the trial, you can join for as little as $29.95 per month; however, there is no obligation. It's awesome! Please check it out by clicking here.

Meatloaf, again!? You bet! (Psssst, it's the best!)


Meatloaf doesn't sound like a gourmet dinner.  It's isn't. It's comfort food. It's a classic American dish that dates back for generations.  This particular meatloaf recipe is my #1 most viewed recipe from my blog. That pretty much confirms that meatloaf is still a popular main dish.  Meatloaf isn't easy to photograph.  It's a little homely, if you ask me. Until you take a look at the glaze on this version...

I've made my share of meatloaf over the years decades.  I remember adding a load of the canned breadcrumbs (I now make my own.), a can of condensed cream of mushroom soup, or even some of that onion soup mix to a mound of hamburger meat.  They were good, I'll grant it that.

What makes this particular meatloaf recipe so special are a few key things-- I use a combination of ground beef, ground pork and ground veal.  (I have no idea if this would taste as good using ground turkey. I've never tried it.) For those of you who make the best Italian meatballs...you know exactly what I'm talking about!    I cook the onion and garlic, just until softened.  I also use fresh marjoram and thyme.  Last, but not least, I make my own bread crumbs with my food processor and then whisk together fresh eggs, milk, hot sauce and Dijon mustard.  The star of the show is the glaze. Oh, the glaze!  It's so simple-- ketchup, brown sugar and cider vinegar.  While the meatloaf is cooking, your kitchen will be filled with a savory aroma that will make the men in your house start to ask when dinner is ready. I'm speaking from personal experience.
 You don't need to -- heaven forbid-- open a can of brown gravy, or make one from a packet.

Just make some creamy Yukon gold mashed potatoes.  Gravy doesn't hold a candle to this luscious glaze. I'm serious!

You'll be so busy savoring the right balance of onion and garlic, marjoram and thyme and then that glaze hits that spot on your taste buds that says "wow"!  This recipe makes about 10 servings.  There are three of us living in one house.  Leftovers will be fairly divided.  Meatloaf sandwiches are in my future. Mayo and a little mustard. Lettuce and tomato, please. No pickle.

How do you make this recipe?  You can either click here to see step-by-step photos.  Or, just scroll to the bottom of this post and you'll a printable recipe card. 
If you have a meat-and-potatoes kind of person in your life, make this recipe.  They will go back for seconds, and even thirds.

I'm speaking from personal experience. For the record, I ate one-and-a-half slices.  That doesn't count as seconds.

The Kitchen Heroine,


Red Wine Braised Short Ribs

Whenever my husband and I dine out, Braised Short Ribs or Osso Bucco is usually what we catches our interest.  For us, there's something so comforting, and mouth-watering,  about a meat that is slowly braised in a tomato-based liquid, with red wine.  When it's served over polenta, it's a no-brainer that this is what we'll order.  But at a restaurant, these dishes can cost $25.00 and up!  I recorded an episode of  Chef Hubert Keller's cooking show, "Secrets of a Chef" (on a local public television channel) at least a year ago, and I wrote down the recipe.  (I haven't seen any recent episodes for his show, and I miss the way he demonstrates how to make his recipes).  This particular recipe intrigued me, because Chef Keller uses lemongrass and ginger, which adds a whole new layer of aromatics and flavor.  Best of all, he made a soup from the leftover short ribs and sauce-- and I did the same thing.  First, I'll show you how I made the short ribs:

9NOTE: A printable recipe card is at the bottom of this post.) First, heat olive oil in 5-quart sauté or casserole pan over high heat. Next, lay the short ribs out on a clean work surface and season all sides with salt and pepper.  When the oil is almost smoking, add ribs and let sear on high heat, 5 minutes per side or until well browned. Use tongs to rotate the ribs. Once browned on all sides, remove ribs with tongs and place on a baking tray.

Add onions, carrots, celery, ginger, and garlic to the same pan.  Smash the lemongrass stalk with the back of knife, slice, and add to pan. Sauté vegetables for 2 minutes, or until softened.  Over high heat, add red wine and scrape bottom of pan with wooden spoon as wine comes to a boil.  Add tomato paste, diced tomatoes, brown sugar, parsley, beef stock and sage leaves to pan and bring to a simmer.

 Add ribs back into pan and cover with a tight-fitting lid.

One of my favorite parts of braising is how the aroma wafts throughout the kitchen.  This smelled so good, that our mouths watered.

The short-ribs were very tender, and there was plenty of sauce...
You'll want to strain the sauce and thank the vegetables for flavoring it so well, because they will could be discarded-- however, I saved them for a soup recipe that is coming up very soon.  You could use the veggies, the the leftover strained sauce is going to make a delicious soup (recipe coming up on my next post).

Creamy polenta goes perfectly with this dish. You could serve it with mashed potatoes, if you prefer.

TASTING NOTES:  I confess, that I made this dish a year ago (I can now appreciate my newer camera,  after seeing the less than stellar quality of these).  The dish was delicious, and cost a fraction of what we'd pay in a restaurant.  While it took a little time to chop and prep the vegetables, plus some searing time, I could clean up the kitchen and relax while the oven finished the job for me.  The meat was falling-off-the-bone tender.  The sauce...oh, the sauce!  So far, this is my favorite braised short-rib recipe I've made.   For that reason, because our weather has been cooler and with some rain, I think a braised short rib dinner is in order-- and it's this recipe that will have an encore presentation at our dinner table.

For a while, it seems that I'll only be blogging once a week.  I have so many recipes I want to share with all of you, but my work schedule doesn't allow me the time it takes to edit photos and post recipes.  But, I promise, to share with you the Short Rib Soup Recipe.   


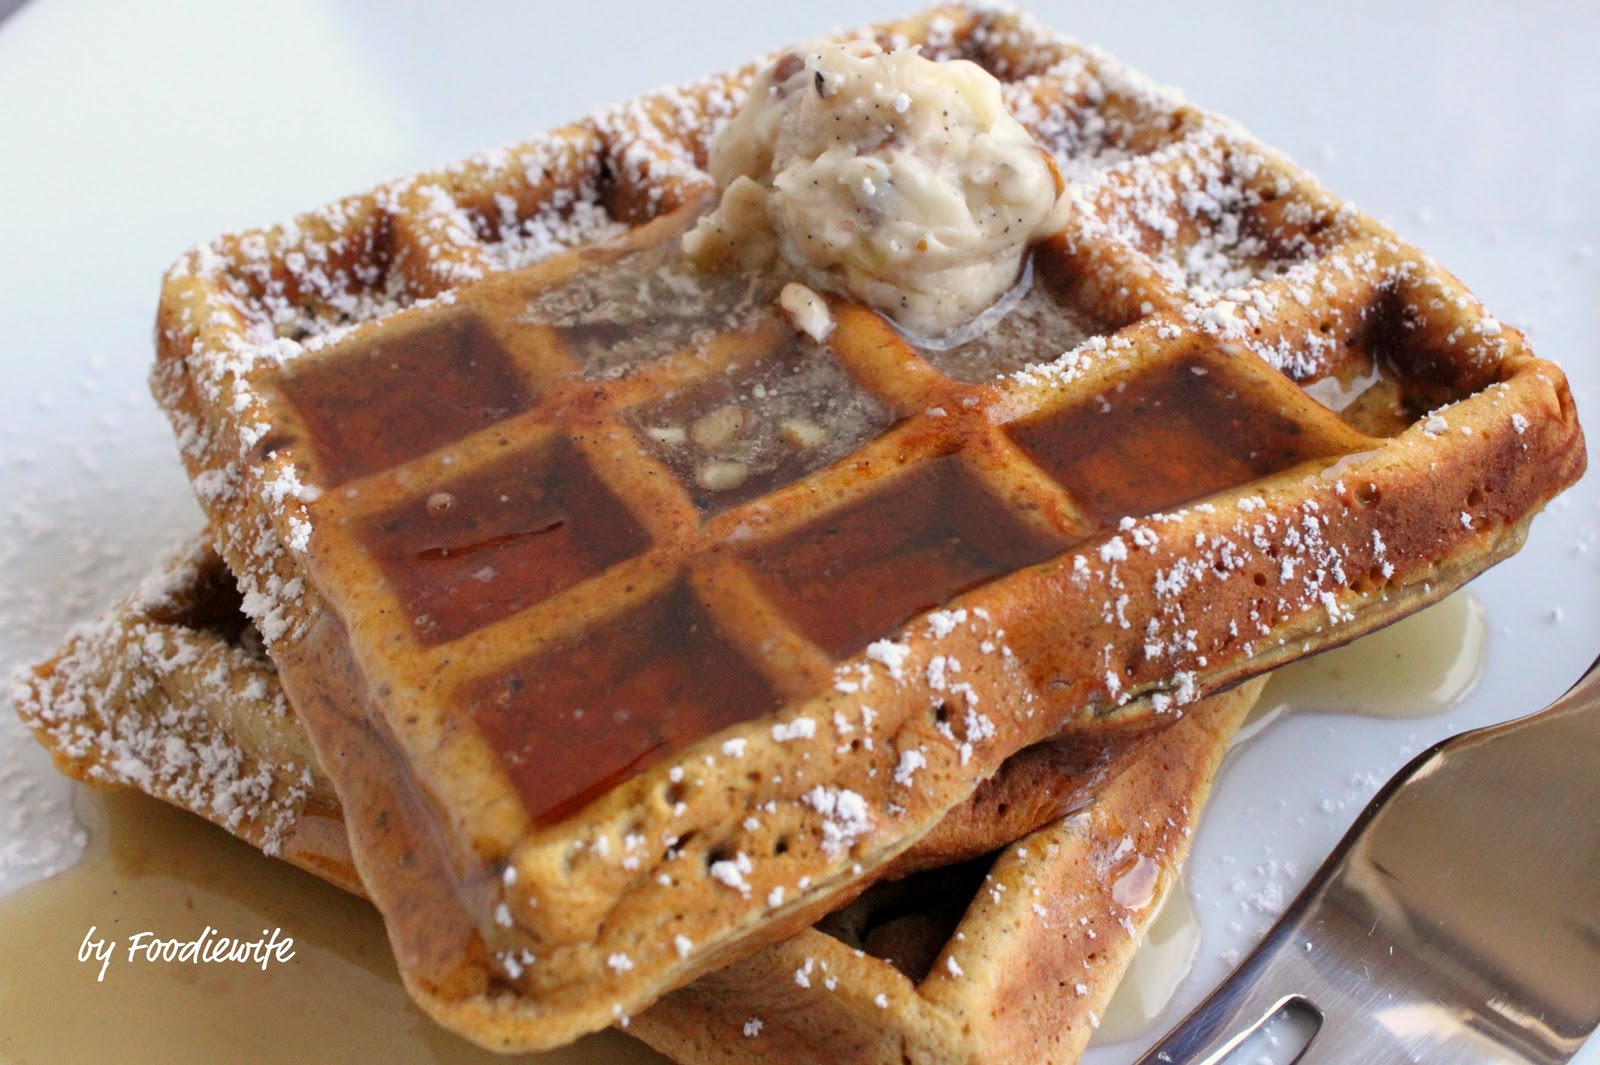
Gingerbread (Pumpkin) Waffles

I have a Christmas morning breakfast idea for you.  I've been making these waffles for several years.  This waffle recipe tastes like Christmas, to me-- ginger, pumpkin, molasses, cinnamon.  They're even better when you have Vanilla-Pecan Butter to go on top.  Oh, yeah.

I had extra Vanilla Bean Pecan Butter from the Roasted Brussels Sprouts with Pomegranate Molasses recipe that I made.  Perfect!  The waffles are also a great way to use leftover pumpkin puree.  For those of you who feel that an unused can of opened pumpkin puree goes to waste-- freeze it.   Last year, I made my own pumpkin puree-- just to see if it's worth it.  I froze 1-cup portions into a ziploc bag, which is a very convenient to way to measure what you need.  It just so happens that you need 1 cup of pumpkin puree.   A quick thaw in a bowl of water gets you on the way in a snap.

For the dry ingredients, I'll bet that you have these in your pantry right now.  If not, then spices usually go on sale this time of year. Stock up!

(A printable recipe is at the bottom of this post.)  We need unbleached flour, baking powder, cinnamon, salt, ginger and nutmeg.

For the wet ingredients, we need eggs and brown sugar.  We also need melted butter.

...and molasses.  I keep an opened jar of molasses (I don't use it very often) way in the back of my fridge. I don't know how long this jar has been stored, but it's still good to go.  TIP: I teensy bit of oil to my measuring cup before measuring the molasses...

...1/2 cup molasses.  1 1/2 cups milk is the last wet ingredient (I used 1% milk).

GADGET CHECK:  I received this ball whisk as one of my gifts from the Foodbuzz Blogger Festival, last month.  I wasn't sure what was so special about it, and then it hit me.  Duh!  Unlike a regular whisk, I don't get big gobs of stuck dough when I whisk wet into dry ingredients.   Hold on... I'll show you.

First, we whisk all the wet ingredients.  See how easily the molasses slides right out of the measuring cup? I do this with honey, too.  

 add milk and melted butter and whisk one more time...

So, now, let's add the wet to the dry, with my new favorite ball whisk.

Check it out!  No clumps of batter on the ends.  See how easily I'm addicted to amused with kitchen gadgets? Let's make waffles...
  

Brush some butter on the waffle iron...


Warning: This recipe makes a LOT of batter.  


These smell like gingerbread cookies, as they cook. 

These deserve maple syrup.  I stopped buying commercial pancake syrup a few years ago. Have you ever read the ingredients listings? Go ahead. Look!  High fructose corn syrup?  Artificial flavors.   My family has converted over to pure maple syrup, and we'll never go back.  Maple syrup is such a versatile ingredient, too. 


Speaking of versatile ingredients...  I received a lovely package from Red Ape Cinnamon.  I wanted to take this cinnamon for a test drive with this recipe.  I am impressed with the products that this company provides. I like that they are very conscious of our planet.  It's a feel-good kind of product to buy, and it's the kind of quality that Ina Garten would have in mind when she says "use good cinnamon".   Their website says:
Red Ape Cinnamon™ is sustainably harvested in Indonesia from Cassia Cinnamon trees that are at least 20 years old. The Volatile Oil (V.O.) content is much higher in older trees resulting in a higher quality cinnamon.
You will notice that Red Ape Cinnamon™ is a lighter reddish brown color than the darker cinnamon you are accustomed to seeing. Only the pure inner cinnamon bark is ground and the extra outer bark that would normally dilute the final powder is disposed of. It is because of this grinding process that our cinnamon delivers a more intense cinnamon flavor experience.
You can order it on-line and I've found it at Whole Foods.  I'm going to buy this brand from now on.  I have another recipe I'll be sharing, that includes Singing Dog Pure Vanilla Extract and their Vanilla Bean Paste.  The lovely folks with this company will let me choose a reader to receive them as well. So, yes, I have another giveaway coming up with my next post. 

 The waffles are ready...

...add some Vanilla Bean-Pecan Butter (or regular butter)

...a dusting of powdered sugar looks nice

...a nice drizzle of pure maple syrup. Hungry yet?

VERDICT:  The texture of these waffle are a cross between tender and dense.  That might sound contradictory, I know. The pumpkin puree adds moisture and some density.  The ginger and cinnamon flavor really comes through, and the molasses gives that rich color and flavor, with just the right balance of sweet.
Kids will love these.  I make all of the batter and then freeze the waffles. They become homemade frozen waffles that heat well in a toaster oven.  Shall I reveal the source of this recipe?  Here it comes-- Rachel Ray. I saw this on her show at least five years ago.  It's a winner!

Thank you Red Ape Cinnamon, for sending me a generous jar of your cinnamon to try.  I love it. Seriously.  I use a lot of cinnamon, and it's nice to see that this is a sustainable product.  That means a lot to me.

A printable recipe card is at the end of this post.

Enjoy!


Support : Creating Website | Johny Template | Mas Template
Copyright © 2011. Delicious Food Kitchen - All Rights Reserved
Template Modify by Creating Website
Proudly powered by Blogger